
Tuesday, December 23, 2014
Junk Journal
I've decided I should start practicing techniques in a junk journal, so I have begun to do just that. For this first page I used metallic paint for the first time. I also tried my luck at painting a face.
Mixed Media Canvases
Now, I don't always make canvas art, because I'm to cheap to buy canvas, but their was an art fair this summer, and these are three canvases I sold.


Let's Catch up on Journaling
So, I apologize, but I have not posted in a long time, but I don't think that many people actually read this, it's more for my own amusement. I have been busy with art journaling so here are some pictures:
This is not my favorite page by any means, I did however like how the eye's tears are watering the flower.


This page is one of my favorites. I used a credit card to make the shelves, and I cut the door out of a catalog.


This is not my favorite page by any means, I did however like how the eye's tears are watering the flower.
This page used a lot more paint than I normally use.
I was having a rough day when I made this. I doodled my feelings and then covered it in paint. It was a very therapeutic process.
This page is one of my favorites. I used a credit card to make the shelves, and I cut the door out of a catalog.
For this page, I used some candy wrappers, they were a pain in the butt to stick down.
As you know, I really like the Hero's of Olympus series by Rick Riordon. After the book came out I created this art journal and a series of icads to go with it.
Friday, August 8, 2014
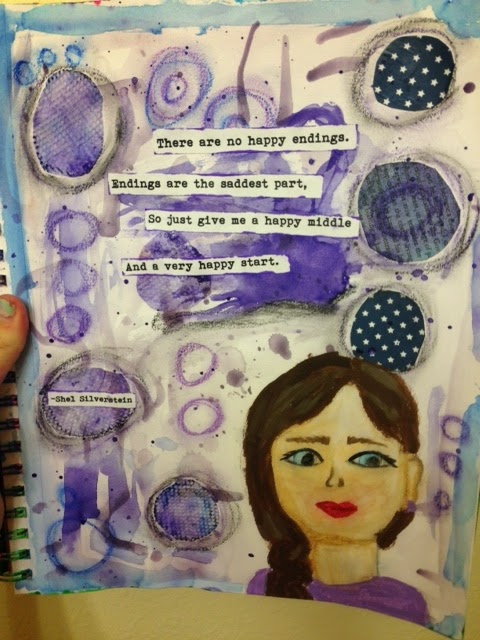
Journal Page 14
This time I experimented with water-soluble oil pastels for the face and smudged circles.
Thursday, July 24, 2014
Journal Page 13
I created this one with the idea of painting the images I wanted instead of stamping or paper cutouts. I also added tissue paper which I don't do often.

Journal Page 12
I created this page for my birthday. I used gesso for the first time on this piece as well.


Journal Pages 4-7
So it appears I didn't post a few of my journal pages so I'll do that now.
For this one I didn't want to use any paint or mod podge. I call it the dry technique.


I added oil pastels this time for some light blue detailing.

For this one, I covered the corners with embroidery thread and then painted over it.

For this one I didn't want to use any paint or mod podge. I call it the dry technique.
For this one I used fabric for the first time on the mesh tree.
I added oil pastels this time for some light blue detailing.
For this one, I covered the corners with embroidery thread and then painted over it.
Friday, June 27, 2014


Monday, June 16, 2014

Chrome and Mint...A Match Made in Heaven
I experimented with two of my favorite polishes recently and came up with this really chic style.
Two accent fingers, and the rest have mint polish. I created the bow on my thumb with a striper by first drawing a line at the bottom of my nail. Then two loops at the top and two lines at the bottom.
The other accent nail is mint dots on a chrome base.
The bow is a little blurry in the picture...whoops.
Thursday, June 5, 2014
For the Feels
As many of you may know, The Fault In Our Stars movie comes out tomorrow. I decided, it being a potentially emotional film, to decorate a tissue box. These are the steps I took, but you should go wild and use your imagination!
1. Paint base blue, it took two coats to cover how I wanted
2. Paint designs and quotes
3. Add stick on jewels (These didn't get into the picture)

1. Paint base blue, it took two coats to cover how I wanted
2. Paint designs and quotes
3. Add stick on jewels (These didn't get into the picture)
Monday, February 17, 2014
Wire Word Necklace
A word that means a lot to someone turned into a fashion statement necklace, yes please! I wanted to make a special present for my friend's birthday, and this is what I came up with. To begin, I printed of the word I wanted to use in a cursive font so I could use it as a template.
Materials for this project:
Needle-nose pliers
Beading wire
Chain
Circle rings
Pencil
Beads (optional)
Claw clasp (optional)
1) Start forming your first letter, mine was a capital L. Be sure to have a bit of extra wire at the beginning so that you can form a loop at the end.
2) Start forming the other letters and be sure they are all attached. A tip when making circles, use a pencil and wrap the wire around it. Also, the needle-nose pliers work to bend the wire into tight areas.
3) Once you have the entire word formed, make a tiny loop at the top right hand corner, and the bottom left.
4) Open a circle ring and attach it to the bottom loop, attach one side of the chain to that loop.
5) Now you can add beads. I added two.
6) Attach the other side of the chain to the opposite loop using another circle ring.
7) At this point I chose to be done, but you could cut the chain and add claw clasp.
Picture Below:)
Saturday, January 25, 2014
Journal Page 3


Sorry, this picture turned out really blurry. This page is entitled 'be a star'.
I used:
old book pages
washi tape
stamps
ink pads
card stock
scrapbook paper
blue and purple acrylic paint
modpodge
fine tip sharpie
letter stickers
Sunday, January 5, 2014
Tape Chevron Nails
This is the nail trick that will change your life!
I've seen chevron nails all over the internet and on my quest to find a way to accurately create this look I came across several people who recommended this way.
Step one: Paint your nails your base color.
Step two: While those are drying, paint a strip of scotch tape the color of your stripes.
Step three: Cut the tape into thin strips using silly scissors (the kind that look like mountains)
Step four: Apply the strips to your nails.
Step five: Apply a fast drying top coat and your done!
Picture Below:)

Journal Page 2
This page came to be through my finding of a new technique. It's where you mix one part water, one part paint. This mixture is put in a spray bottle, and then the magic happens. When you use brown paint it can make paper look aged.
The quote I chose is, "Don't cry because it's over, smile because it happened," -Dr. Seuss
Materials I used:
Black and Brown Acrylic Paint
Spray Bottles
Old Book Pages
Charcoal and Pencils
Mod Podge
Patterned Paper
Homemade Stamp (string wrapped around cardboard for texture)
Ink Pad
Picture Below:)

The quote I chose is, "Don't cry because it's over, smile because it happened," -Dr. Seuss
Materials I used:
Black and Brown Acrylic Paint
Spray Bottles
Old Book Pages
Charcoal and Pencils
Mod Podge
Patterned Paper
Homemade Stamp (string wrapped around cardboard for texture)
Ink Pad
Picture Below:)

Subscribe to:
Posts (Atom)